|
Creating a FundMonkey web page requires basic
computer skills and knowledge of Microsoft Word. Open
Office Writer (free) can be substituted for MS Word. Files must be saved in a .doc format.
You are STRONGLY encouraged to create your FundMonkey web page as soon as
your license is registered. Even if it
isn't perfect, your web page will be your portal for accessing the campaign
management tools.
Once you have registered your fundraiser,
you can login to your account by clicking "Log In" just beneath the FundMonkey logo. Or you can click here to
login.
--------------------------------------
First click create Web Page and establish your
unique sub domain. Each sub domain
will be similar to myschool.fundmonkey.com so try to be creative with your
domain names.
Check your spelling carefully. Once you've chosen your domain name it is
difficult to change and will result in a fee of $25 for changing the domain
name.
--------------------------------------
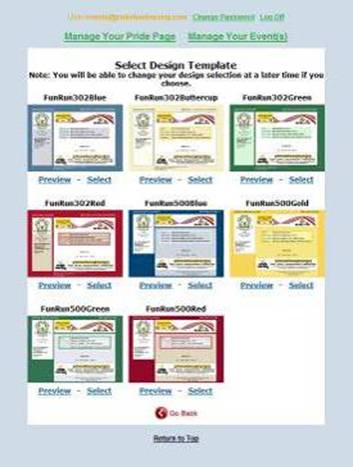
We provide eight different design templates
for your FundMonkey web page. You can
preview the templates below and then make your final selection. Templates can be changed any time.
--------------------------------------
One last chance at the confirmation page to
change either your Domain Name, your email address or your web page template. Check your spelling carefully, once the sub-domain is created, you
cannot change it.
--------------------------------------
Lastly, once you've made your design
choices, you will be asked to agree to the Terms and Conditions for using
FundMonkey's online campaign management tools.
Congratulations on
setting up your FundMonkey page. You
now have a "shell" for creating a customized web page that will process
on-line donations.
--------------------------------------
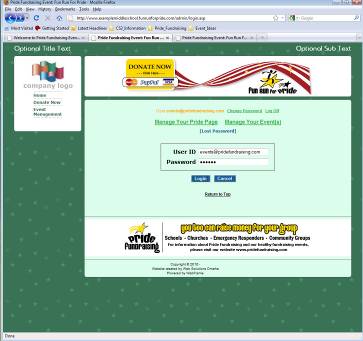
Once you've gone through
the steps of setting up your FundMonkey web page, you will need to login to
your new sub domain. An email will
be sent within a few minutes with your login information and a link to your
FundMonkey page. Your login screen
will look similar to the one below.
--------------------------------------
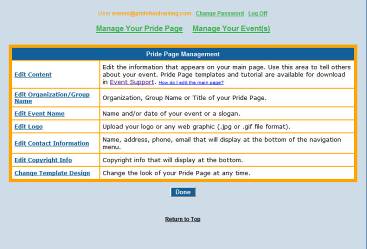
Login by clicking on "Log In" within your web page and enter
your username and password. Click "Edit Your FundMonkey page" to access
the editing menu below.
Use the page management
menu to edit the different sections of your web page by using the easy to use
menu.
Each section on the left
will click through to a menu that will allow you to add your event specific
data.
--------------------------------------
You may start by editing your main
page. Click "Edit Content" from the FundMonkey
Page Management tool bar. The main
page simply consists of a Microsoft Word document. For a variety of MS Word templates, click here.
Once your Microsoft Word template has been edited
to your liking, save the file onto your hard drive.
NOTE: NEVER use floating text boxes in your Fundraising web page. For best results setup a table with cells
for placing text, graphics and photos.
NOTE:
Always refresh your browser or clear your browser history to see your
changes.
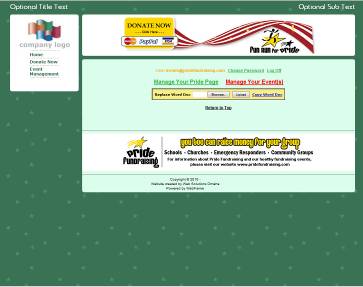
Go to the FundMonkey web page editing and
"edit content" and then click on the "Browse" button, and find your updated
file. Select your file and then click
"Upload".
Your Webpage is ready for viewing, you can
edit and upload your page as often as you like.
Make changes to your webpage whenever
needed. When you are ready, send the
link to your participants with the Campaign Management interface and publish
to other web pages.
|


